
7 Steps to Create an Interior Design Moodboard
Creating a stunning and cohesive interior design requires careful planning and visualization. One effective way to bring your ideas to life is by creating a moodboard. A moodboard serves as a visual representation of your design concept, helping you curate colors, textures, patterns, and themes. In this article, we will guide you through seven simple steps to create an interior design moodboard that will inspire and guide you in designing your dream space.

Step 1: Define Your Design Vision
Before diving into the creation of your moodboard, it’s essential to have a clear vision of your design concept. Consider the style, ambiance, and overall atmosphere you want to achieve in your space. Collect inspiration from various sources such as magazines, online platforms, or even personal experiences. This initial step sets the foundation for your moodboard and ensures that your design concept remains focused and consistent.
Step 2: Gather Inspirational Images
Begin by collecting a range of inspirational images that resonate with your design vision. Look for images that reflect the colors, textures, furniture styles, and architectural elements you envision for your space. Pinterest, design blogs, and online image galleries are great sources for finding inspiring visuals. Aim to gather a diverse selection to capture different aspects of your desired design aesthetic.
Step 3: Select Key Colors and Textures
Identify the key colors and textures that will define your interior design concept. Study your inspirational images and identify recurring patterns or color schemes that appeal to you. Look for complementary and contrasting color combinations that evoke the desired mood. Additionally, pay attention to the textures and materials that catch your eye. This step will help you create a cohesive and harmonious moodboard.
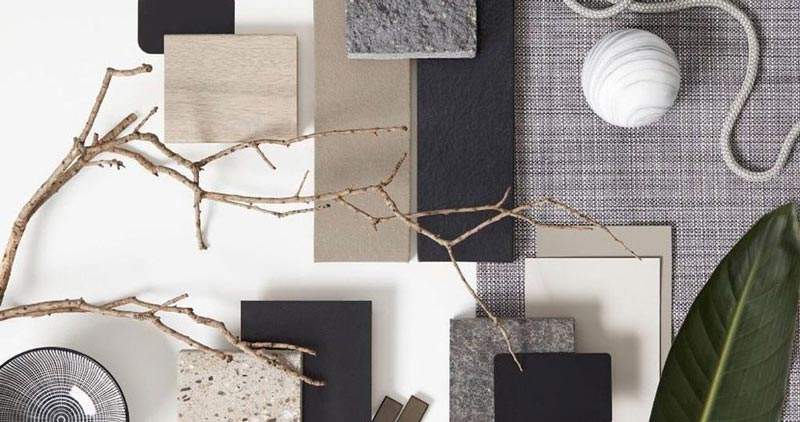
Step 4: Compile Materials and Samples
To add depth and tactile quality to your moodboard, gather physical materials and samples such as fabric swatches, wallpaper cuttings, flooring samples, and paint chips. Having these tangible elements on your moodboard will provide a realistic representation of the textures and materials you plan to use in your design. It also allows you to assess how different materials work together visually.
Step 5: Arrange and Assemble
With all your inspirational images, colors, textures, and physical samples at hand, it’s time to start assembling your moodboard. Begin by organizing your images and materials based on similarity and relevance. Experiment with different arrangements to find the most visually appealing composition. Consider using adhesive materials like glue or pins to securely affix your items to a large poster board or foam core.
Step 6: Add Descriptive Labels
Enhance the clarity of your moodboard by adding descriptive labels. Include details about the specific colors, materials, and products showcased on your moodboard. This labeling not only helps you remember your design choices but also serves as a handy reference when discussing your ideas with professionals or suppliers. Make sure the labels are clear and legible, complementing the visuals on your moodboard.
Step 7: Evaluate and Refine
Once your moodboard is complete, step back and evaluate the overall composition. Assess how well the elements come together and whether they accurately represent your design vision. If necessary, make adjustments by swapping out or rearranging certain items. Remember that a moodboard is a dynamic tool, and it’s perfectly fine to refine and update it as your design concept evolves.
Creating an interior design moodboard is an exciting and essential step in the design process. By following these steps, you can effectively organize your ideas, explore various design elements, and communicate your vision clearly. Let your moodboard inspire and guide you as you start designing your dream idea.